3 Steps to Open Your First Photography Studio | Bluffton Studio Photographer
The chance to open an actual photography studio was not something that was even remotely on my radar, but when the opportunity presented itself, I couldn’t pass it up!
The thought of starting from nothing was intimidating, to say the least, but I pulled it off and I couldn’t be more proud of the outcome.
Although I wasn’t totally starting from nothing because I had a small garage studio to start with, there was still a good amount of things I had to get for the real studio.
I want to share with you the 3 steps I took to get my studio off the ground without overwhelming myself (too much, at least ?).
1. Identify your genre of photography
and the purpose of your studio
I knew I wanted my primary focus to be on Christmas Mini Sessions and hosting Pictures with Santa. I opened the studio on November 15, so this seemed like an appropriate goal. I also knew that after Christmas I wanted to focus on cake smashes and seasonal mini sessions for kids with a slight boho vibe.
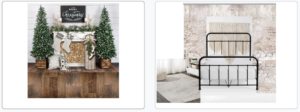
Start a rough design of what you want everything to look like. I used Google Slides to brainstorm how I wanted the main and secondary sets to look. (I use Google docs for everythinggggg, I even designed the house we were building in Slides ?) I make the docs interactive by linking what I’ll purchase to each image.
2. Make a list of your must-haves and wants
Prioritize things in order of importance
Keep in mind that not everything has to be brand new but also find middle ground with “buy it nice or buy it twice”. Take advantage of thrift stores in your area as well as Facebook Marketplace to find the best steals and deals.
For the santa set I knew I needed a backdrop (HSD Backdrops) and flooring (Lowe’s). For the boho bed set I needed a backdrop (Kate Backdrop), a wire frame bed (FB Marketplace), a mattress & box spring (also Marketplace), a rug (Amazon), and plain white bedding (Target).
From home I brought in a desk, a kid’s rocking chair, a chair that Santa would sit on, and other various Christmas decorations. For something a little extra, I saved my Amazon boxes and wrapped them for decoration ?.
If you’re opening a newborn or family photography studio the things you need might look a little different.
3. Invest in studio necessities
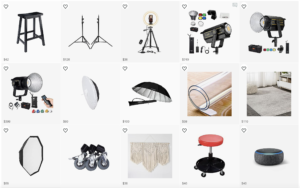
There are just some things that you can’t run a studio without. Going in to this, I had some knowledge of OCF (off camera flash), but I was clueless when it came to studio lighting. I spent a couple hours chatting with B&H Lighting Pros telling them my situation, my goals, and my budget.
Based off the things we talked about, they recommended I get 2 Godox Video Lights (one for my main source of light and one for balance), an umbrella with a diffuser, and a softbox. This was the priciest investment and I actually sold off some old camera bodies and lenses I wasn’t using to afford all of it. If you’re wondering how I usually get my expensive camera gear, you can read about that here.
I already had some nice light stands from using my OCF at weddings, so I just added some caster wheels (from Amazon) to make them mobile.
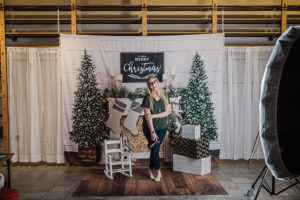
Other things I had to get were backdrop crossbars, chains, and S-hooks. With my set up I was fortunate enough that I don’t have to have each backdrop on an actual stand. There’s a rod I can hang them from in the studio (see in the picture above). I also got a rolling shop stool so I wouldn’t have to squat down in pictures.
By some stroke of luck I was able to get my studio ready in about a week and a half. If I can do it with everything else I have going on, so can you! If you need anything, have anything to share or add, drop a comment! I’d love to hear it.
xoxo, Elle
January 21, 2022
xoxo,
Elle
GRAB YOUR GUIDE
Take the guesswork out of preparing for a session with my in-depth, 23-page guide, that has tons of links and photo examples!
Session Prep & Style Guide
the free guide!
